
New to Info Grove is our “Payments” feature for offering in-app purchases with a credit card. Currently, Info Grove payments integrate with Stripe accounts (Update June 2022 – Bambora is no longer supported)

After you’ve created your Stripe account and 14 Oranges has enabled the integration for your application, you can begin to add products/services for sale.
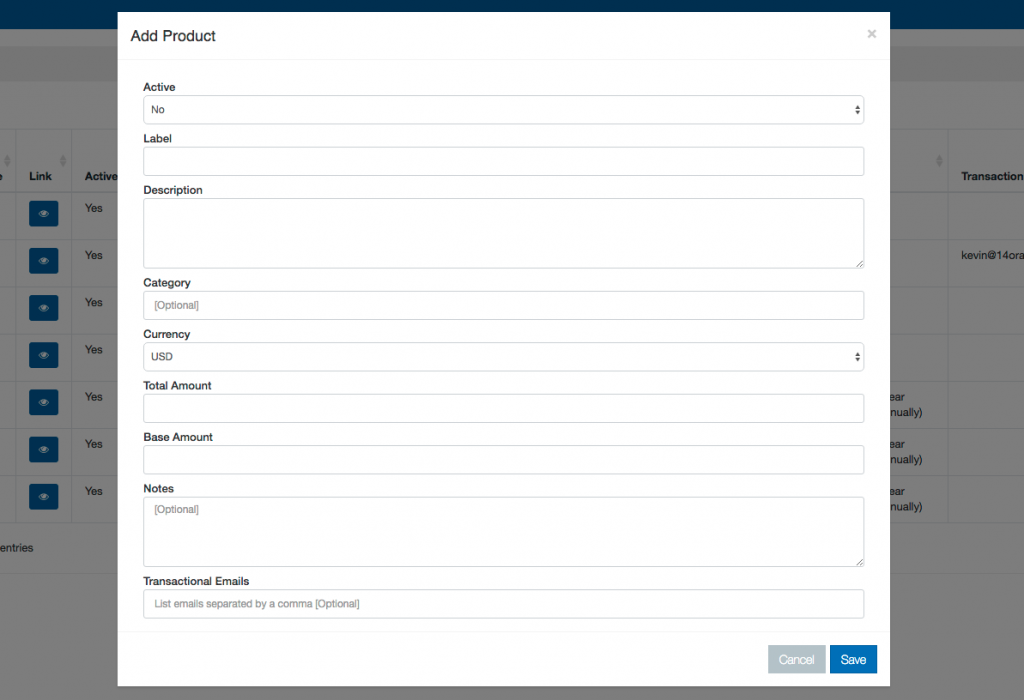
Payment Terminology
Active: Toggle on and off to remove products from your store but keep product information in the backend.
Label: Label is the title of your product.
Description: Describe any relevant details about your product, such as the size of clothing, info about an event, and etc.
Category: If needed, add categories to organize your items on sale, such as events, clothing, or memberships.
Currency: Switch between Canadian and U.S. dollars.
Total Amount: Total amount after all tax and/or shipping costs.
Base Amount: The amount before tax.
Notes: Any additional notes for your sale item.
Transactional Emails: Receive email notifications for completed purchases.
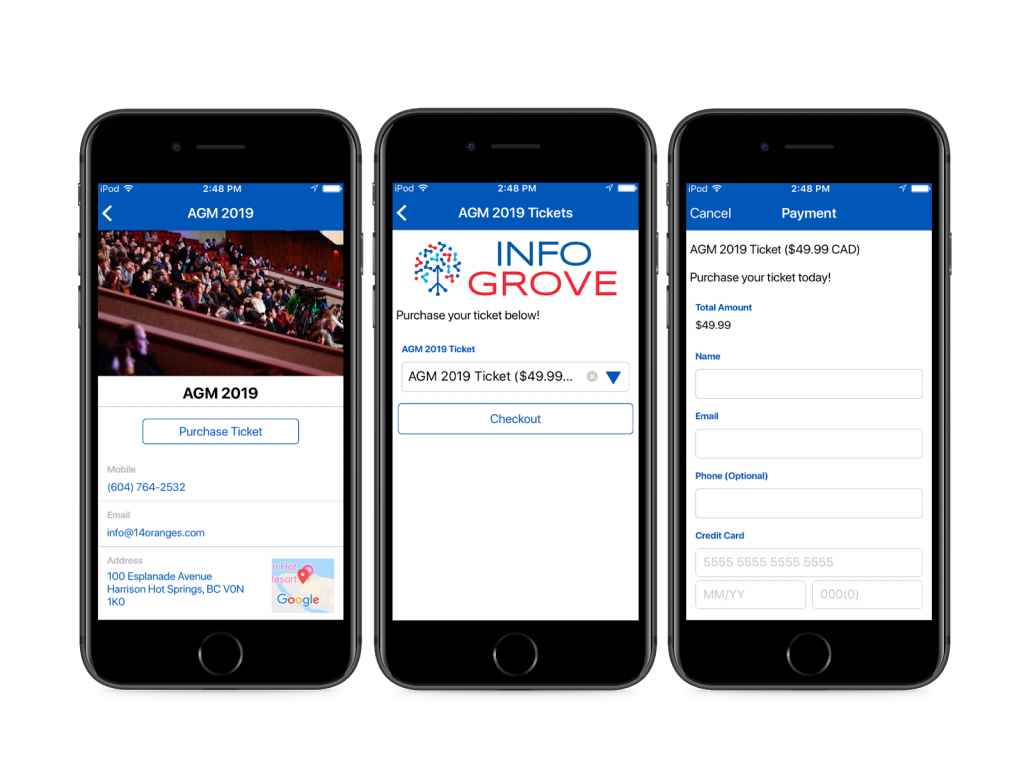
Example: Event tickets
Example: Products

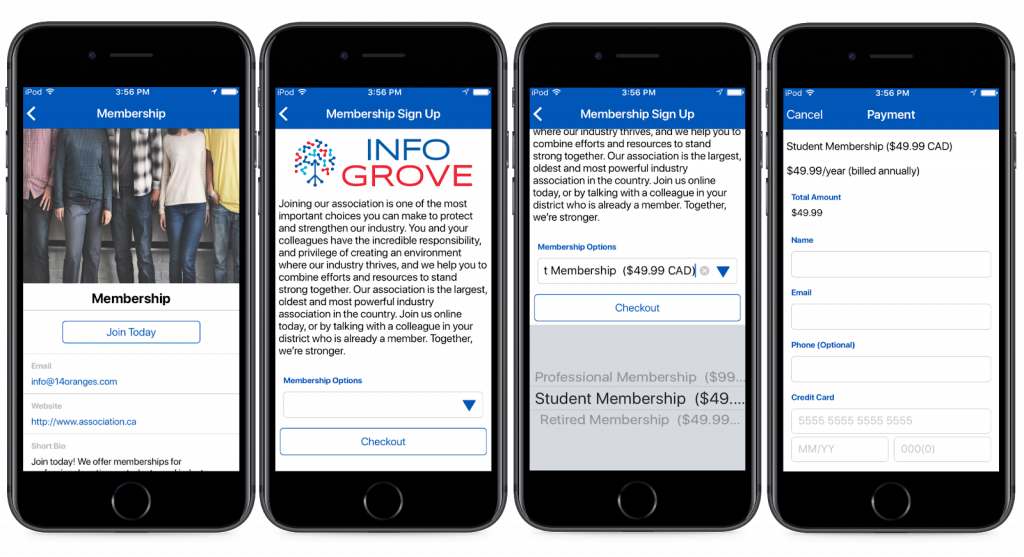
Example: Membership Sign Up
How to add products for sale in Info Grove
1) Enable the Stripe, integration for your entity
2) Enable data sources (v3) and enhanced form (v3) on the backend modules and for your app version
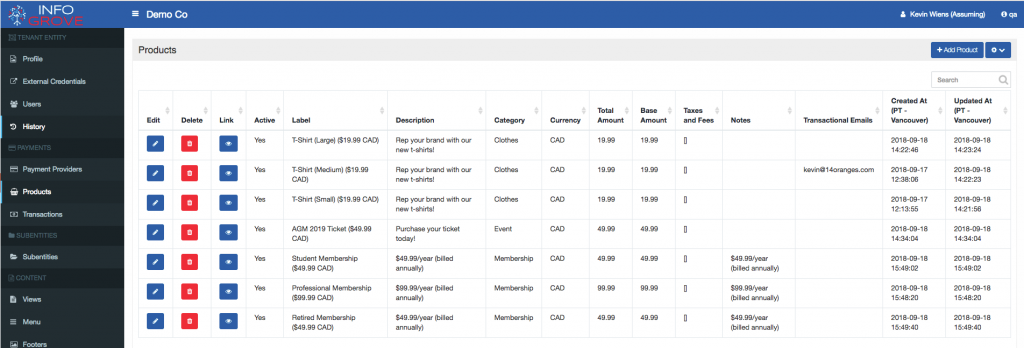
3) On the tenant entity, go to Products and create your products
3) Create a data source with a products list. Select the products that you want on this list from the “Values” button.
4) Create an enhanced form (v3)
5) On your enhanced form, select the data source that you created earlier
6) Go to Payment Providers, add your payment provider. Add in the provider specific configuration fields (API key etc – retrieve these from your test payment provider account)
How to display products for sale in Info Grove
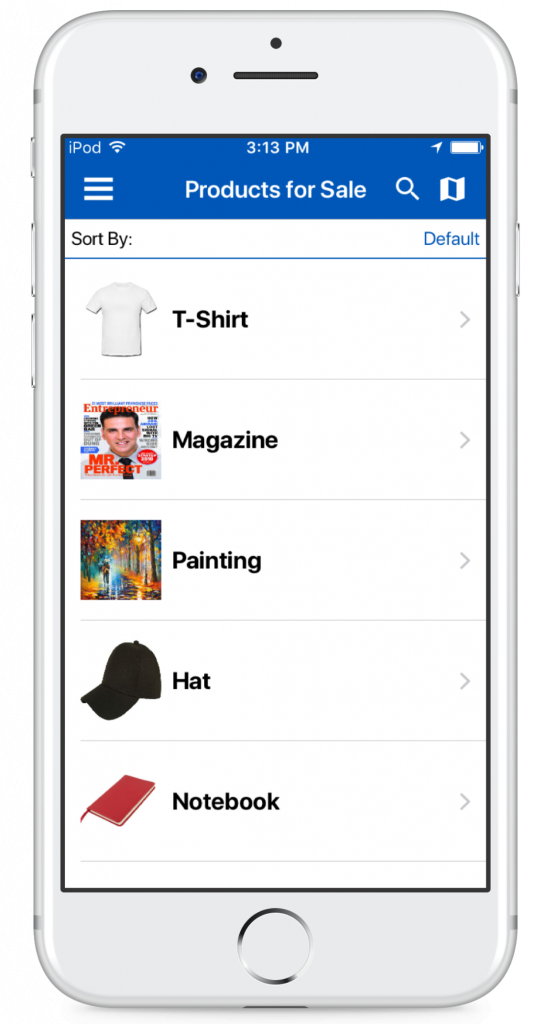
Displaying products (as shown in the photos above) works well with a “Plain List.” The first step is to create the plain list for what you want to sell.
After filling your products in the plain list your sales page will look something like this:
After finalizing your products, product descriptions, and price information, you will need to create “module links” that create the “purchase button.” The module link will take app users from the product to the purchase page (which you’ve already created with the enhanced form.)
When creating your module links, select the product you want to sell (From module) and redirect to the purchase page for the same product (To module).
Lastly, create the name of the button, such as “Purchase” or “Buy Now”
If you are just selling one product you will need to “add a single record” on the menu management section. If you are selling the entire list of products (the plain list) you need to add the plain list view to the menu and all your products will be displayed.
Info Grove: Accept In-App Payments
Share This Article