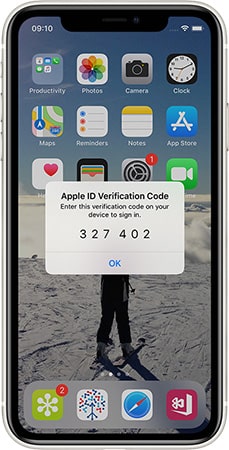
Over a year ago, Apple enforced setting up Two Factor Authentication (TFA) on their Apple IDs forcing many app developers to set that up for their main account. At the time, we had many customers request some help and guidance on how to best set that up and we prepared a quick document that we shared with them. We are still seeing some customers struggle with that and especially with customers where the main account holder has left the company. As such, we have decided to share our document right here on our blog in hopes that it helps everyone. We are actually sharing our entire document including how to set up TFA although you have probably done that by now but we felt it was better for completeness.

Apple’s Two Factor Authentication is a system to increase the security of your account in which trusted devices (or phone numbers) are sent a code whenever Apple servers feel it is required. Typically if you sign in from a new computer/device or on some schedule (only known to Apple), you will be required to enter a code. The key here is that in order to enable the two factor authentication, you will need to have at least one Apple device (iPhone, iPod, iPad, or Mac) signed in with the SAME account used for your Apple Developer account.
We realized this may be problematic as your organization may use a generic Apple ID to sign in to App Store Connect / Developer Portal and your device may be using your personal Apple ID. We initially had the same issue here at 14 Oranges. Unfortunately there is no way around this at the moment. You will need one Apple device. Fortunately, you only need the device to set up the Two Factor Authentication process and once it is set up, you can rely on receiving text messages to trusted phone numbers.
Here are the general steps to setup Two Factor Authentication:
1) Prepare on desktop
a) Sign In at https://appleid.apple.com on a desktop (Windows, Mac, Chrome OS).
b) Under the security section, click on Get Started for the Two Factor Authentication (TFA). A dialog will come up with some info on TFA. Click Continue. The next screen will give you instructions on what to do next.
2) Setup TFA from your device
a) Follow the instructions provided by Apple to setup TFA.
b) You may need to sign out of your personal Apple ID first.
3) Setup Trusted Phone Numbers back on Desktop
a) We recommend adding Trusted Phone Numbers to your account.
b) Go back to https://appleid.apple.com. You may need to refresh your screen or sign out and sign back in.
c) You should see the device used in step 2 under Trusted Device. That’s the device that will receive the code whenever Apple challenges the sign in.
d) To add a Trusted Phone Number, click on Edit under the Trusted Phone Number list and follow the instructions. Note that it is likely easier if the phone number is a mobile number able to receive text messages. You will need access to that phone when setting it up as a code will be sent to the phone as part of the on-boarding process.
4) Subsequent logins
a) If you are able to keep your Trusted Device signed in to the same account as your organization apple account, every time you sign in and Apple challenges the sign in, a code will appear on your device. You can enter the code and you are good to go
b) If you are unable, you can click on “Did not receive a verification code?” and then select “Use phone number” and then select the number from the list of trusted phone numbers you wish to receive the code to via a text message.
c) Enter the code.
The key parts of the document are in sections 3 and 4. We highly recommend adding additional employees in your organization as a trusted phone number to the Apple ID entered as “Account Holder” for your organization. That way if the account holder leaves your organization, you can still get into the account without going through the trouble of contacting Apple to get the account transferred to another Apple ID. Unfortunately having just their username and password is not enough anymore because of TFA. With other users entered as Trusted Phone Numbers, you are able to get into your account and continue working uninterrupted.
Once you are in the account, you can look to transfer the Account Holder role to another member of your team by following the instructions here.


Share This Article